Audience: Store admin or manager
Every count starts with a snapshot of what MicroBiz thinks you have on hand. You export that snapshot from MicroBiz, upload it to the Inventory Count module, and the module compares it to what you count.
Step 1: Export expected stock from MicroBiz
- In MicroBiz, go to Reports > Inventory Reports > Inventory By Item Report.
- Change the Visibility filter from Product to SKU. This makes the UPC columns available.
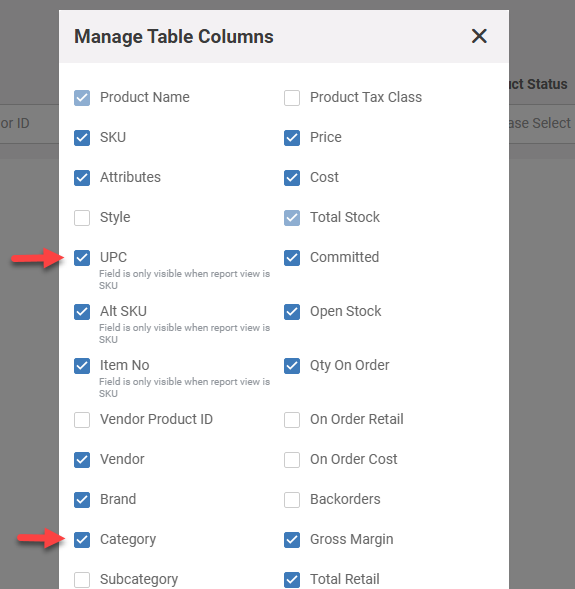
- Using manage table columns settings accessed using the gear icon next to the cancel button at the top right, add the UPC column to the report if you scan UPCs that are stored in Alternate ID fields.
- Add the Category column if you want to filter by category in Inventory Count.
- Export the report to Excel, then save it as a CSV file. Inventory Count requires a CSV file for the upload.
Tip: If your UPCs begin with zeros, format the UPC columns as Text before saving, or the zeros will be dropped and scans will not match.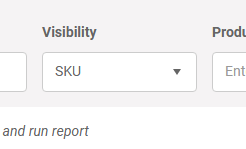
Tip: Fix problems in MicroBiz before you export. By default, items with negative open stock in your file are imported, which gives them a negative expected quantity. You can skip them with the Exclude negative open stock setting when you set up the count. Correct negatives in MicroBiz (use backorders for items sold before they were received). MicroBiz often leaves zero on hand as an empty cell. Those rows import as an expected quantity of 0 unless you turn on Exclude blank open stock.
Tip: Make sure each UPC belongs to only one SKU. If two SKUs share a UPC, every scan of that UPC goes to the first SKU alphabetically. See Scan and count items on the floor.
Step 2: Upload expected stock CSV file from MicroBiz into the inventory count module.
- Upload the expected stock file.
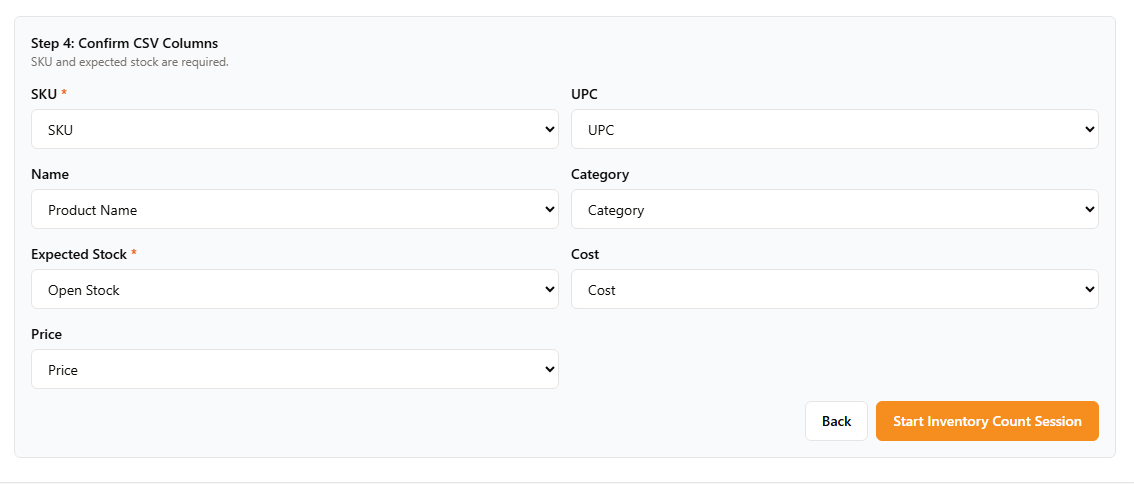
- Match your file’s columns to the module’s fields. SKU and Open Stock are required. UPC, name, category, cost and price are optional.
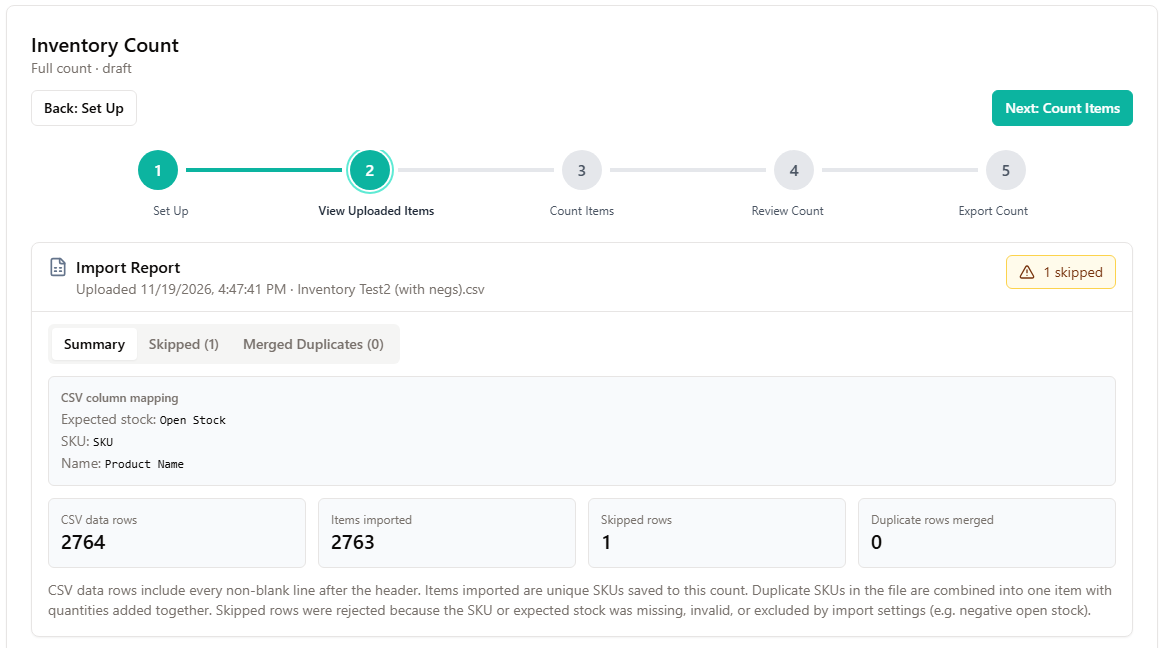
- Review the import summary, which shows duplicates that were merged and any rows that were skipped, then continue to Uploaded items.
Important: The count scope and the uploaded file cannot be changed after you start. To use a different list, start a new count.
Step 3: Review the uploaded items
The Uploaded items screen lists every SKU in your file, with product photos when available.
- Search, or filter by category, to find items.
- Exclude rows you do not want in this count. Excluded rows stay in the snapshot but are left out of counting and export.
- Open the Skipped tab to see rows that were skipped and why. Rows only appear here if you turned on Exclude negative open stock or Exclude blank open stock.
Who can do this
Starting a count and editing its setup requires the Manage setup permission. By default that is managers and admins.